Just another WordPress.com weblog

Archive for September, 2010

Pork medallions with mustard sauce

I have a new favorite pork tenderloin recipe, and it’s pork medallions coated in a creamy mustard onion sauce. I took 1 tenderloin, cut it into 6 pieces and gave them a couple of whacks to thin them out some. They spent 1 1/2 hours ish swimming in a brine of 1 gallon of water, 1/2 cup salt, 1/4 cup sugar, more or less. Did I mention I’m a brine junkie? It’s hard to like white meat not injected full of salt when you know how good it tastes and how tender it makes the meat.

Anyway, I coated the rinsed and dried the pork medallions with a flour/salt/pepper/cayenne mix. The cayenne didn’t really come through, but I like to pretend it made a difference. Once I got to that point, I pretty much followed the recipe to the tee. I subbed the leeks for 1/2 of a huge onion, thinly sliced. I used my homemade chicken stock and my homemade sour cream.

I thought that when I added the sour cream, it messed up of the texture of the sauce a little. But when I put the sauce into the pan I sauteed the pork in, it cooked down and there was no issue. I added a little cornstarch but it’s really not necessary.

Pork Medallions with Mustard Chive Sauce

Serves 3

Ingredients

  • 2 tablespoons butter, divided
  • 2 tablespoons olive oil, divided
  • 2 cups chopped leeks (white and pale green parts only, about 2 med.)
  • 1 cup low sodium chicken broth
  • 1/2 cup dry white wine
  • 2 cloves garlic, minced
  • 1/2 cup sour cream or 1/2 cup creme fraiche
  • 3 tablespoons whole grain Dijon mustard
  • 2 (1 lb) pork tenderloins, each cut crosswise into 6 slices
  • 3 tablespoons chopped fresh chives, divided

Directions:

  1. Melt 1T butter with 1T olive oil in large skillet over med-high heat.
  2. Add leeks and cook until beginning to turn golden, stirring frequently, about 5 minutes.
  3. Stir in broth, wine and garlic.
  4. Boil until mixture has reduced to 1 2/3 cups, about 4 minutes.
  5. Whisk in sour cream and mustard. (The sauce can be made 2 hours ahead. Let stand at room temperature.).
  6. Melt 1T butter with 1T oil in another large skillet over med-high heat.
  7. Sprinkle pork with salt and pepper.
  8. Saute until browned and cooked.
  9. Transfer pork to platter.
  10. Add sauce to skillet, simmer sauce over med heat until slighly thickened, scraping up any browned bits, about 2 minutes.
  11. Stir in chopped chives.
  12. Season with salt and pepper if needed.
  13. Return pork to skillet.
  14. Cover and cook over med.
  15. Heat until just rewarmed,stirring frequently.
  16. Sprinkle with additional chives and serve.

Rotisserie style chicken

Calling this rotisserrie chicken is almost an insult. It was so packed full of flavor all of the way through and it was very moist and juicy. I’m glad, because I spent almost two days prepping this chicken! I knew I wanted to cook it Tuesday night, so Monday morning I soaked the chicken in a brine. Monday night I rinsed off the brine, wiped the chicken dry, and rubbed a great seasoning mix on the skin, inside the cavity, and on the skin. I stuffed the chicken with some quartered onion, garlic cloves, and half of a lemon. I also added some lemon zest to the rub. The chicken hung out until 3 o’clock, which is when I popped it into the oven. I expected it to take maybe 4 hours, but at 6 the internal temperature was in the 170s. Luckily, the chicken didn’t dry out. My chicken was a little over 4 lbs and it was soaked in a brine, so that explains the shortened cooking time. Also, I poured some white wine (maybe 1/2 cup) in the bottom of the roasting pan.  I used that to baste until the chicken starting releasing it’s own juices, around the 1 1/2 hour mark. I didn’t even care how the skin turned out, because we don’t really eat that part.

I rested the chicken upside down for a while. That’s a tip I get from Alex’s Day Off, and it makes the juices flow back into the breast. I also spooned the pan juices over the carved (ok, butchered) chicken. When I get a roasting pan, it would have been the perfect amount of juice to make a killer gravy.

Since I brined the chicken, I cut the salt in the rub by 1/2. I also used the full amount of rub on 1 chicken. I used half regular paprika, half smoked paprika, and next time I could increase the cayenne. I left out the white pepper.

Roast Sticky Chicken – Rotisserie Style (All Recipes, but it’s also on Food.com)

Jacob and I ate a little less than 1/2 of our bird

Ingredients

  • 4 teaspoons salt
  • 2 teaspoons paprika
  • 1 teaspoon onion powder
  • 1 teaspoon dried thyme
  • 1 teaspoon white pepper
  • 1/2 teaspoon cayenne pepper
  • 1/2 teaspoon black pepper
  • 1/2 teaspoon garlic powder
  • 1 medium onion, quartered
  • 4 cloves peeled garlic
  • 1 lemon
  • 1 (4 pound) whole chicken

Directions

  1. In a small bowl, mix together salt, paprika, onion powder, thyme, white pepper, black pepper, cayenne pepper, and garlic powder. Remove and discard giblets from chicken. Rinse chicken cavity, and pat dry with paper towel. Rub each chicken inside and out with spice mixture. Place 1 onion into the cavity of each chicken. Place chickens in a resealable bag or double wrap with plastic wrap. Refrigerate overnight, or at least 4 to 6 hours.
  2. Preheat oven to 250 degrees F (120 degrees C).
  3. Place chickens in a roasting pan. Bake uncovered for 5 hours, to a minimum internal temperature of 180 degrees F (85 degrees C). Let the chickens stand for 10 minutes before carving.

Here is the chicken brine I used. I didn’t use the full amount of anything, and I just used a splash of oil. Between this brine and Kittencal’s buttermilk brine, I will never cook plain chicken again! I found other brines with herbs, but I’m not sure the flavor would come through that well. I’d rather add the herbs later.

Simple Chicken Brine (All Recipes)

Ingredients

  • 1 gallon warm water
  • 3/4 cup kosher salt
  • 2/3 cup sugar
  • 3/4 cup soy sauce
  • 1/4 cup olive oil

Directions

  1. Pour the warm water into a container that is twice the volume of the water. Pour in the salt, sugar, soy sauce, and olive oil. Stir until the sugar and salt have dissolved, then allow the brine to cool to room temperature.
  2. To use, place chicken in the brine, cover, and refrigerate two hours for skinless breasts, 4 hours for bone-in pieces, and 4 hours to overnight for whole chickens. Drain and pat the chicken dry before cooking. One gallon of brine is enough for 6 pounds of whole chicken or bone-in chicken pieces, and up to 10 pounds of skinless, boneless chicken breasts.

Maple mustard pork

The sauce for this was really good. I marinated pork tenderloin in the sauce overnight, but I don’t think it really penetrated the meat that well. The pork tasted really good though, because I basted it frequently and I browned the pork then finished it in the oven. I heated up he leftover marinade I didn’t use to thicken it so I could use it as a sauce. My only change to the sauce was to add a little bit of hot sauce.

Pork with Maple and Mustard Glaze Sauce (All Recipes)

Ingredients:

  • 2 1/2 pounds boneless pork loin roast
  • 1 cup real maple syrup
  • 4 tablespoons prepared Dijon-style mustard
  • 2 1/2 tablespoons cider vinegar
  • 2 1/2 tablespoons soy sauce
  • salt to taste
  • ground black pepper to taste

Directions

  1. Preheat the oven to 350 degrees F (175 degrees C).
  2. Stir together the maple syrup, mustard vinegar, soy sauce, salt, and pepper in a small bowl. Place pork roast in a shallow roasting pan. Spread glaze evenly over pork roast.
  3. Roast pork in the preheated oven uncovered, until internal temperature measured with a meat thermometer reaches 160 degrees F (70 degrees C), about 1 hour. Remove from oven, and let rest about 10 minutes before slicing to serve. (I cook until 140, the oven temp was 425. It took about 20 minutes after browning. I might try browning for a little longer next time.)

Shepherd’s Pie

I’ve never had Shepherd’s Pie, and I’d never even heard of it until one today when I was searching for ground beef recipes. But I really wanted to try it, because how can meat, sauce, and cheesy mashed potatoes be bad? It was actually really good. It didn’t blow my mind away, but it was really tasty. I would add peas next time for the color more than anything. The worchestershire is a really strong flavor, and the tomato paste adds a sweetness. I used my food mill to make the mashed potatoes, which makes them smoother than I could ever do by hand-mashing. I used 1 big potato, a splash or two of milk, 1 tbsp butter, and S&P. I topped with smoked gouda cheese, which tasted good but didn’t really melt and get bubbly. Another option would be to stir the cheese into the potatoes.

This is a pretty good meal, but I would maybe try a different version just because it’s not crazy exciting. Crepes of Wrath has a different version that’s probably not traditional, but it sounds good. It has wine and canned diced tomatoes.

Shepherd’s Pie (Emeril, with inspiration from Mummy Boone and Proper English Cottage Pie)

Serves 4-6 (1/2 of the recipe was 3 big servings for us)

Ingredients:

  • 1/4 cup unsalted butter
  • 1 pound chopped lamb shoulder or lamb fillet
  • 1 cup chopped yellow onions
  • carrots, chopped
  • 1 1/2 teaspoons salt
  • 1 teaspoon ground black pepper
  • 4 ounces button mushrooms, wiped clean and sliced
  • 1 bay leaf
  • 2 tablespoons all-purpose flour
  • 1 tablespoon tomato paste
  • 1 1/4 cups lamb or beef stock
  • 1 teaspoon Worcestershire sauce
  • 1 pound potatoes
  • 1/8 teaspoon ground nutmeg
  • 1/2 cup heavy cream
  • 1/2 cup white cheddar, grated

Directions:

Lightly grease a 6-cup baking dish and set aside.

Melt 2 tablespoons of the butter in a large saute pan over medium high heat. Add the lamb and cook until starting to brown, about 3 minutes. Add the onions, carrots, 3/4 teaspoon salt, and 1/2 teaspoon of the pepper, and cook, stirring, for 2 minutes. Add the mushrooms and bay leaf, and cook, stirring, until their liquid is almost all gone, about 4 minutes. Add the tomato paste and cook, stirring, until starting to color, about 1 to 2 minutes. Add the flour and cook, stirring, for 1 minute. Gradually add the stock and Worcestershire sauce, and bring to a boil. Reduce the heat to medium-low, cover, and simmer until thickened, about 20 to 25 minutes.

Preheat the oven to 400 degrees F.

Meanwhile, place the potatoes in a medium pot and cover with salted water by 1-inch. Bring to a boil and cook until tender, about 10 minutes. Drain in a colander and return to the pot. Over low heat, mash the potatoes with a potato masher. Add the remaining 2 tablespoons of butter, 3/4 teaspoon of salt, 1/2 teaspoon of pepper, and nutmeg, and mash to incorporate. Add the heavy cream and mix well. Remove from the heat.

Remove the pot with the meat from the heat. Remove the bay leaf. Spoon into the prepared dish and top with the mashed potatoes, smoothing the top. Sprinkle the cheese over the top and bake until browned and bubbly on top, 10 to 15 minutes. (Mine baked 20.) Remove from the oven and serve immediately.

King arthur big white sandwich bread

I got the sudden urge to make a sandwich bread last night, for no reason at all except for I hadn’t made one in a while. I chose a bread made in a 9X5 pan that wasn’t full of butter like other white breads. This one promised to be thinly slice-able and perfect for every type of sandwich. I was a little nervous because I’d been having problems with the size and rise of my last few loaf breads. This one actually rose a tiny bit too fast for me, so I had some bubbly crust issues. Also, I rubbed the top with Land of Lakes butter spread, which I can probably skip next time. And it still didn’t spring up in the oven like the pictures indicated. Other than that, the bread was everything it was promised to be. It tasted good, wasn’t crumbly, and I can slice it really thin. This bread is going to last me a long time, because it’s so big. It made a delicious grilled cheese today. I used cheddar, mozzarella (the stick kind!), a little mayo, and some roma tomatoes.

King Arthur’s Classic White Sandwich Bread

Ingredients:

  • 1 1/4 cup to 1 1/2 cup water, lukewarm
  • 1 heaping tablespoon honey (I subbed sugar because I’m currently out of honey)
  • 2 1/4 teaspoons instant yeast
  • 1 3/4 teaspoons salt
  • 2 tablespoons soft butter
  • 4 cups King Arthur Unbleached All-Purpose Flour
  • 1/3 cup Baker’s Special Dry Milk or 1/2 cup nonfat dry milk granules
  • *Use the lesser amount in summer or humid climates; the greater amount in winter or drier climates.

Directions

1) Mix all of the ingredients in the order listed, and mix and knead — by hand, or using a stand mixer — to make a smooth dough. It won’t be particularly soft nor stiff; it should be smooth and feel bouncy and elastic under your hands.
2) Place the dough in a lightly greased bowl, or large (8-cup) measuring cup. Cover it, and let it rise for 60 to 90 minutes, till it’s become quite puffy, though not necessarily doubled in size.
3) Gently deflate the dough, and shape it into a fat 9″ log. Place it in a lightly greased 9″ x 5″ loaf pan.
4) Cover the pan, and let the dough rise for 60 to 90 minutes, till it’s crowned 1″ to 1 1/2″ over the rim of the pan. Towards the end of the rising time, preheat the oven to 350°F.
5) Bake the bread for 20 minutes. Tent it lightly with aluminum foil, and bake for an additional 15 to 20 minutes, till it’s golden brown. An instant-read thermometer inserted into the center will read 195°F to 200°F.
6) Remove the bread from the oven, and turn it out onto a rack to cool. When completely cool, wrap in plastic, and store at room temperature.
Yield: 1 large loaf, about 18 servings.

Alfredo sauce

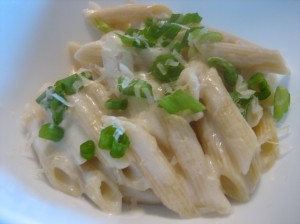
I don’t eat alfredo sauce often, because it’s so fatty and rich. But this recipe is totally delicious, and low-fat! It was really easy to make and it will become a permanent substitution for me. It was nice and creamy and it reheated really well, no lumps. Some great additions would be a pinch of cayenne or some pesto. Today I added chopped tomatoes. I meant to make shrimp alfredo, but the fresh shrimp I bought yesterday smelled kind of funny. So that would be something to try again in the future! I would love to use this sauce to make alfredo pizza.

I made 1/2 of this sauce to serve Jacob and myself.

Guiltless Alfredo Sauce (Our Best Bites)

Ingredients:

2 C low-fat milk
1/3 C (3 oz) low fat cream cheese
2 T flour
1 t salt
1 T butter
3 garlic cloves
1 C grated Parmesan cheese

Directions:

Toss the milk, cream cheese, flour, and salt in a blender.

Process until smooth and set aside.

In a non-stick sauce pan, melt butter on med-high heat and add garlic. Stand above the pan (but not close enough to scald your face) and inhale. Ahhh…butter and garlic. Okay, now get cooking again. Let the garlic saute for about 30 seconds, you don’t want to burn it. It should be nice and bubbly.

Then add milk mixture to the pan. Stir constantly for about 3 or 4 minutes or until it just comes to a simmer. Keep stirring and let it cook for a few minutes more. It should be much thicker now.

When it’s nice and thickened remove the pan from the heat. Add the cheese, stir it up and then cover immediately. Let stand for at least 10 minutes before using. It will continue to thicken upon standing. Also, if you have leftovers in the fridge, the sauce will thicken almost into a solid. Just re-heat and add a little milk and it will be back to normal again.

Fried mozzarella sticks

Yumm…making my own fried cheese sticks was totally worth getting my hands messy and gross. I tried using a fork and the whole wet hand/dry hand thing, which actually works pretty good. But after a while I was bored of breading and wanted to be done faster, so I just dove right in. It might actually be better to use your hands because it’s important that all of the cheese stick is breaded. These were much better than frozen, and even better than some restaurant cheese sticks I can think of. I adapted Pioneer Woman’s recipe a little because I wanted to add a little extra flavor. They were so good that I didn’t want to dip them in my homemade pizza sauce. They both had lots of seasonings and fought with each other. Next time one of them needs to be a little bit simpler. What a weird thing for me to say, haha.

A lot of my cheese sticks leaked cheese a little, either because I didn’t bread them perfectly or because I only froze for the minimum of 20 minutes. It’s ok though, I ate them just the same! Jacob and I ate all but 3 of these. It says it serves 4 but not in this apartment

Panko Mozzarella Sticks

Ingredients:

  • 8 pieces String Cheese, Removed From Wrappers (I used Sargento)
  • ¼ cups All-purpose Flour (I added some cornstarch)
  • 1 whole Eggs (I needed two)
  • 1 tablespoon, 1-½ teaspoon Milk
  • 1/2 cup Panko Bread Crumbs
  • 1/2 cup Italian bread crumbs
  • 1-½ teaspoon Dried Parsley Flakes (I used lots of seasonings…basil, oregano, Italian seasoning, and a little red pepper flakes. I might try adding some garlic powder also)
  • S&P
  • Canola Oil, For Frying
  • Marinara Sauce, For Dipping

Preparation Instructions

Slice string cheese pieces in half, for a total of 32 pieces.

Place flour in a small bowl.

In a separate bowl, whisk eggs and milk.

In another separate bowl, combine panko bread crumbs with parsley flakes.

TO ASSEMBLE: One by one, roll mozzarella sticks in flour, then dunk in egg/milk mixture, then place in panko crumbs. Use your hand to sweep crumbs all over the mozzarella stick. Gently remove and place on a tray or cookie sheet. Repeat until all mozzarella sticks are coated. (I double dipped, going back in the egg and bread crumbs a second time.)

***Place tray in freezer for 20 to 30 minutes to flash freeze.***

TO COOK: Heat 1 1/2 inches canola oil in a large skillet over medium heat. When hot, add mozzarella sticks 8 at a time. Watch closely and turn over to evenly brown, cooking less than 2 minutes. Do not allow cheese to bubble and leak.

Remove to a paper towel-lined plate.

Serve immediately with warm marinara sauce.

Chocolate chip cookie dough cupcakes

What a mouthful to say “chocolate chip cookie dough cupcake” every time you try to describe these amazing cupcakes. But they were so perfect that they deserve the long drawn out name. I made these twice, because I wasn’t too crazy about the actual cupcake part of the first recipe. It was too buttery for me, and they were pretty crumbly. I had some oven problems (again) so the cupcakes were pretty flat and even sunk in just a tiny bit. The second time, I chose a recipe that had less butter and a combination of white and brown sugar. I also saw the browning effects of baking soda. The first recipe had baking soda, and got a lot darker than the second recipe. The pictures are from the first batch. The second recipe is at the bottom.

The most common causes of cupcakes not rising are: oven temp too high or over/underfilling the cupcake mold (my ice cream scoop works perfect.) So make sure to watch for these!

The filling and frosting (chocolate chip buttercream) were perfect, so for the second batch I used the leftover filling and made a fresh batch of frosting. I would love to turn this into a cake so I can use a fork to get bites with all three components. That’s the one thing about filled cupcakes I don’t like – I have to rip them apart to get the perfect bite.

Chocolate Chip Cookie Dough Cupcakes (Annie’s Eats)

Yield:24 cupcakes
Ingredients:
For the cupcakes:
3 sticks unsalted butter, at room temperature
1½ cups light brown sugar, packed
4 large eggs
2 2/3 cups all-purpose flour
1 tsp. baking powder
1 tsp. baking soda
¼ tsp. salt
1 cup milk
2 tsp. vanilla extract
1 cup chocolate chips (semisweet or bittersweet)

For the filling:
4 tbsp. unsalted butter, at room temperature
6 tbsp. light brown sugar, packed
1 cup plus 2 tbsp. all-purpose flour
7 oz. sweetened condensed milk
½ tsp. vanilla extract
¼ cup mini semisweet chocolate chips

For the frosting:
3 sticks unsalted butter, at room temperature
¾ cup light brown sugar, packed
3½ cups confectioners’ sugar
1 cup all-purpose flour
¾ tsp. salt
3 tbsp. milk
2½ tsp. vanilla extract

For decoration:
Tiny chocolate chip cookies
Mini chocolate chips

Directions:
To make the cupcakes, preheat the oven to 350° F.  Line two cupcake pans with paper liners (24 total).  In the bowl of a stand mixer fitted with the paddle attachment, combine the butter and brown sugar.  Beat together on medium-high speed until light and fluffy, about 3 minutes.  Mix in the eggs one at a time, beating well after each addition and scraping down the sides of the bowl as needed.

Combine the flour, baking powder, baking soda, and salt in a medium bowl.  Stir together to blend.  Add the dry ingredients to the mixer bowl on low speed, alternating with the milk, beginning and ending with the dry ingredients, mixing each addition just until incorporated.  Blend in the vanilla.  Fold in the chocolate chips with a spatula.

Divide the batter evenly between the prepared cupcake liners.   Bake for 18-20 minutes, until a toothpick inserted in the center comes out clean.  Allow to cool in the pan 5-10 minutes, then transfer to a wire rack to cool completely.

To make the cookie dough filling, combine the butter and sugar in a mixing bowl and cream on medium-high speed until light and fluffy, about 2 minutes.  Beat in the flour, sweetened condensed milk and vanilla until incorporated and smooth.  Stir in the chocolate chips.  Cover with plastic wrap and refrigerate until the mixture has firmed up a bit, about an hour.

To fill the cupcakes, cut a cone-shaped portion out of the center of each cupcake.  Fill each hole with a chunk of the chilled cookie dough mixture.

To make the frosting, beat together the butter and brown sugar in the bowl of a stand mixer fitted with the paddle attachment until creamy.  Mix in the confectioners’ sugar until smooth.  Beat in the flour and salt.  Mix in the milk and vanilla extract until smooth and well blended.

Frost the filled cupcakes as desired, sprinkling with mini chocolate chips and topping with mini chocolate chip cookies for decoration.

Chocolate Chip Cupcakes (How sweet is is)

makes 12 cupcakes

  • 1/2 cup butter
  • 1 cup sugar (I used 1/2 brown sugar and 1/2 white sugar)
  • 2 eggs
  • 1 teaspoon vanilla
  • 1 1/2 cups flour
  • 1 teaspoon baking powder
  • 1/2 cup milk
  • 1 cup chocolate chips (I ran out and had to use M&M cookies and butterscotch. Not a bad combo!)

Preheat oven to 350.

Cream butter, sugar, and eggs together until fluffy. Add vanilla.

Combine dry ingredients in a bowl. Add half of the dry ingredients, mixing until just combined. Add the milk. Once mixed, add remaining dry ingredients. Add chocolate chips and mix if you’d like them in smaller pieces.

Pour into cupcake tins and bake for 20-25 mins at 350. Let cool, then frost.

Ground beef tacos

I have never, ever liked crispy tacos. Except for the other day, when I randomly decided I did. I ordered some at a restaurant and loved them. And now, I’m pretty sure I’ll be making lots and lots of tacos. I started today with some ground beef tacos. I made my own taco seasoning, and added a few extra flavorings to the water used to simmer the beef. I served with romaine slivers, roma tomato, and feta cheese. Awesome! That’s all that needs to be said.

I used this for the taco seasoning. I eyeballed it, and it seems like a lot, but I could use that entire recipe just for the 1/2 lb+ ground beef I cooked for Jacob and me. Because the beef simmers for a while, it’s ok to use a little extra red pepper flake without hurting my mouth.

Taco Seasoning (All Recipes)

Ingredients

  • 1 tablespoon chili powder
  • 1/4 teaspoon garlic powder
  • 1/4 teaspoon onion powder
  • 1/4 teaspoon crushed red pepper flakes
  • 1/4 teaspoon dried oregano
  • 1/2 teaspoon paprika
  • 1 1/2 teaspoons ground cumin
  • 1 teaspoon sea salt
  • 1 teaspoon black pepper

Here the recipe I followed the most for the taco filling. I added maybe 1 tsp cornstarch in all throughout the cooking process, and used 1 heaping tbsp of tomato paste plus a little extra water. I like the addition of cider vinegar and brown sugar. It gives these tacos an edge over regular tacos.

America’s Test Kitchen Homemade Beef Tacos

Serves 4

Ingredients:

  • 1 tbsp vegetable oil
  • 1 onion, minced
  • 3 garlic cloves, minced (I upped the onion/garlic a little)
  • Taco seasoning
  • 1 lb lean ground beef
  • 1/2 cup tomato sauce
  • 1/2 cup water
  • 2 tsp cider vinegar
  • 1 tsp brown sugar
  • Toppings

Directions:

  1. Heat the oil in a medium skillet over medium heat until shimmering. Add the onion and cook until softened, about 5 minutes. Stir in the garlic, spices, and 1 teaspoon salt and cook until fragrant, about 30 seconds.
  2. Stir in the ground beef and cook, breaking it up with a wooden spoon, until no longer pink, about 5 minutes. Stir in the tomato sauce, broth, vinegar, and sugar adn simmer until thickened, about 10 minutes. Season with salt to taste
  3. Divide the filling evenly among the taco shells and serve, passing any desired accompaniments separately.

Kalua pig

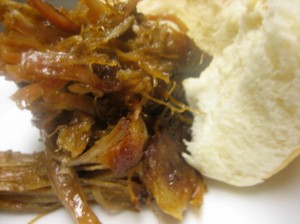
The smell of the pork cooking all day was amazing. Unfortunately, I think it cooked a little bit too long. I used about 2 lbs of pork and cooked for 2 hours on high, then about 8 on low. It was just a little drier than I wanted in some parts. I liked the crust, but overall the dish was a little fatty. I shredded the pork and stirred it into the juices, which I ended dabbing off of the pork on my plate. I don’t think I could cut the fat off before cooking or there won’t any juices, which is necessary for juicy pork. Next time I’ll try cooking for 6-8 hours on low. I increased the salt and smoke flavoring a little bit. Another potential problem is the amount of empty space in the slow cooker because my cut was really small. Next time I’ll make this for a group so I can use a bigger piece. The smoky saltiness was really delicious, so I’ll definitely make this again.

Kalua Pig in the Slow Cooker (All Recipes)

Serves 12

Ingredients

  • 1 (6 pound) pork butt roast
  • 1 1/2 tablespoons Hawaiian sea salt
  • 1 tablespoon liquid smoke flavoring

Directions:

Directions

  1. Pierce pork all over with a carving fork. Rub salt then liquid smoke over meat. Place roast in a slow cooker.
  2. Cover, and cook on Low for 16 to 20 hours, turning once during cooking time.
  3. Remove meat from slow cooker, and shred, adding drippings as needed to moisten.